This article intends to help readers, including those who are interested in but are not familiar with the technical aspects of blockchain, understand the content without much difficulty. The content is about ARK’s BaaS and ARK Deployer, the examples of blockchain implementations.
First, let us briefly explore the concept of the blockchain network and ARK.
Blockchain networks can be divided into public and private networks.
The public network is an open network where people around the world voluntarily participate in developing the ecosystem after the Genesis block had been created. On the other hand, the private network is a closed network that is used only by a specific group of people for particular purposes.
What is BaaS(Blockchain as a Service)?
BaaS allows users to focus more on their business model than on the technical elements of the blockchain.
Also, it assists users in preliminary tasks required to utilize the blockchain, from configuring the infrastructure to installing and operating blockchain nodes. Put simply, BaaS “simplifies the creation and management of blockchain private networks”.
What is ARK?
“ARK empowers everyone, regardless of their aim or technical background, to quickly and easily leverage blockchain technology. We provide the tools and resources that enable individuals, developers and startups to apply blockchain technology as a foundation for their own projects, applications and ideas.” – Source: https://ark.io/
ARK helps users to build their own ecosystems, operate nodes, deploy smart contracts, and develop dApps, in ways similar to EOS or Ethereum that we are commonly aware of.
“How does the ARK Deployer work?”

[Front page of ARK Deployer – Source: https://deployer.ark.io/]
ARK Deployer is based on the web, so it does not require installation, and users can use the service without logging in. However, because ARK does not have its own cloud service, users need to prepare for the infrastructure part separately.
Building and preparing the infrastructure on their own can be a burden on those preparing to launch blockchain-based services. Other blockchains have entered into partnerships with companies that operate their own clouds to receive supports for the infrastructure part.
(QTUM Blockchain and Amazon: https://blog.qtum.org/qtum-announces-a-historic-partnership-with-amazon-web-services-6a197568f6a0)
“Creating a chain at a user-selected level”
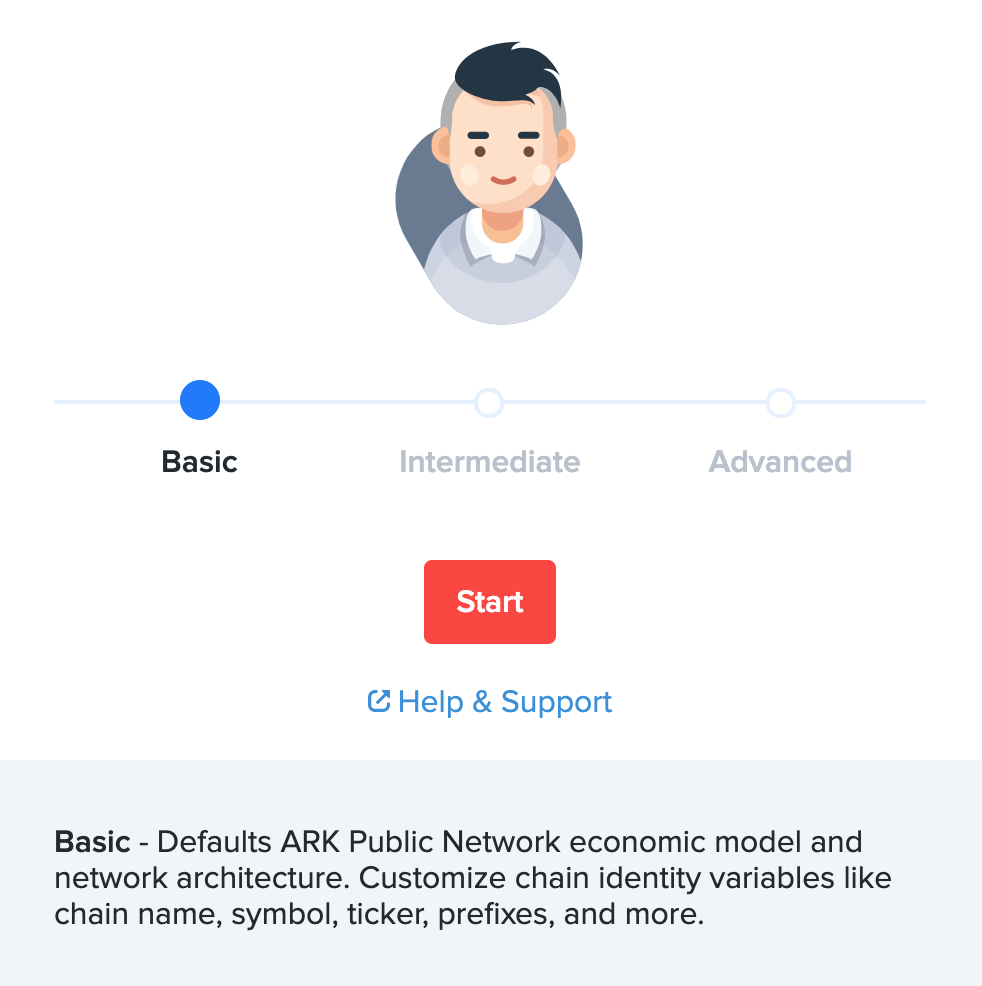
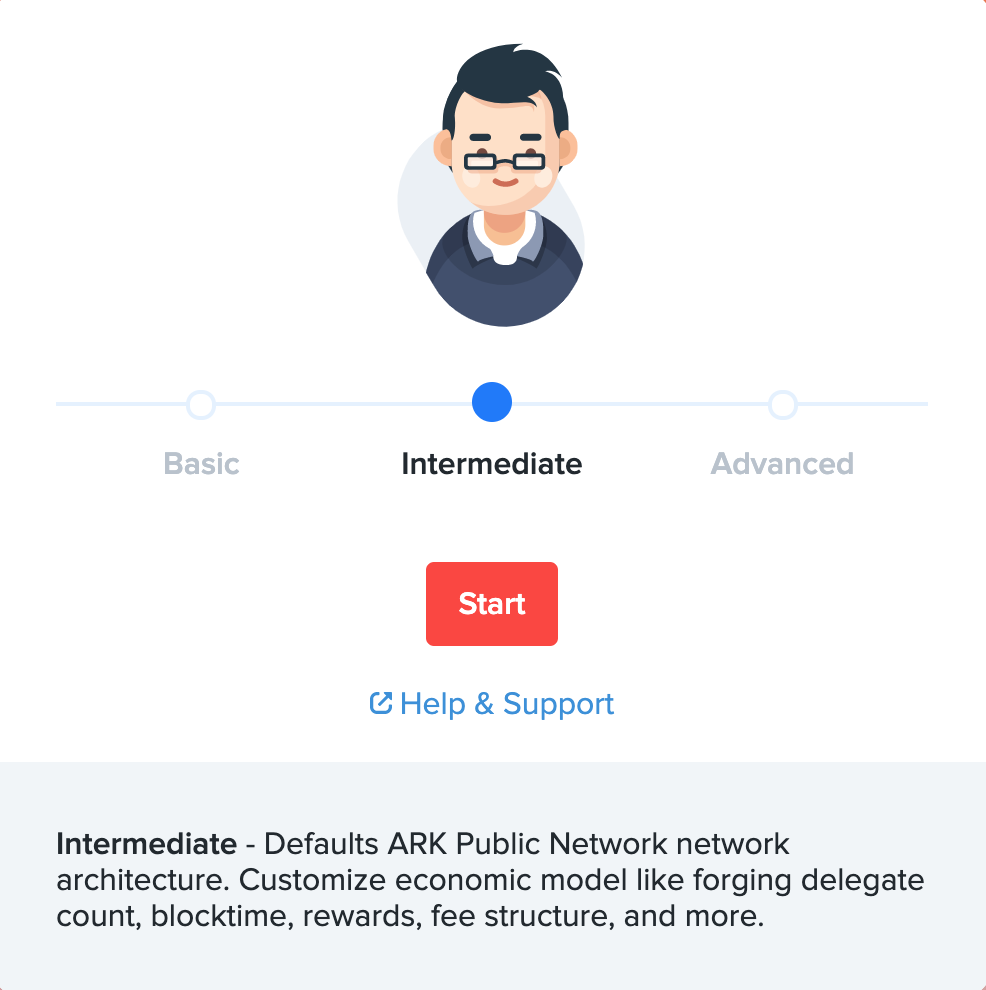
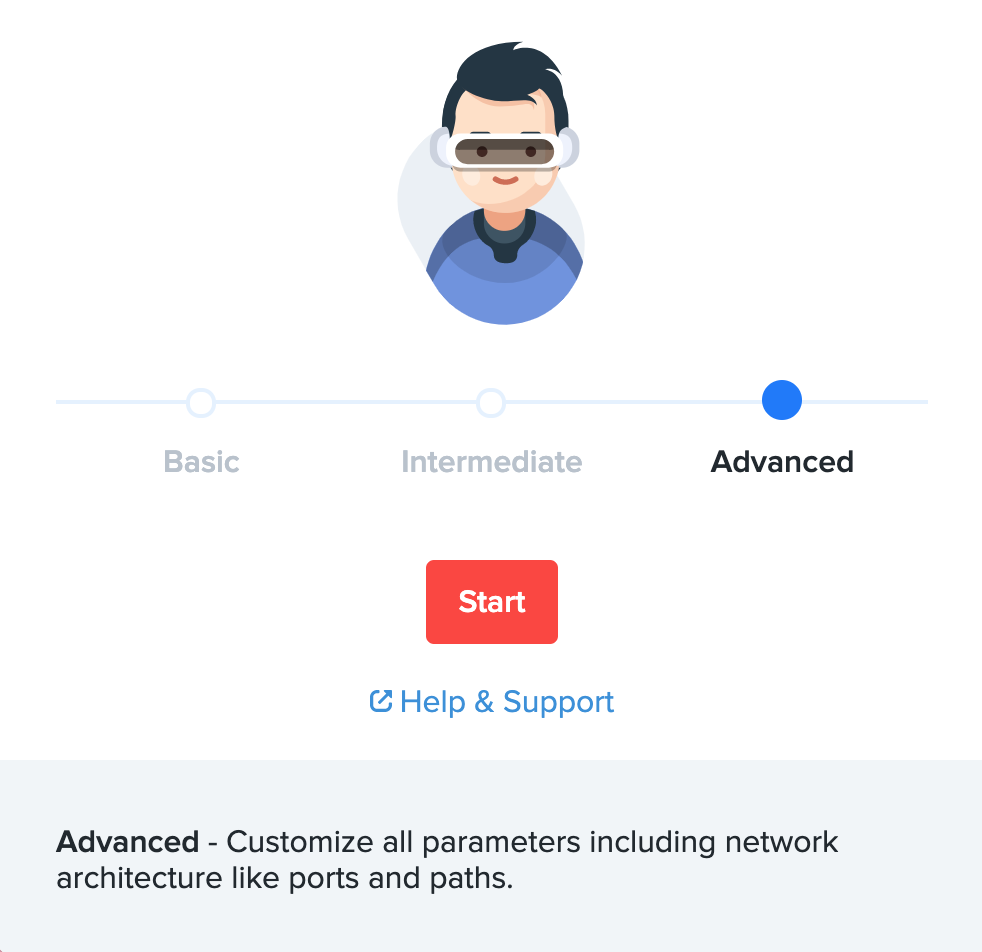
[ARK Deployer’s level selecting page – Source: https://deployer.ark.io/select-level]
This is the first screen that appears when users press the chain “Create” button at the ARK Deployer’s front page.
Users can select between three levels, and even those who lack understanding of blockchain can easily create chain through the Basic level. Users with some prior knowledge can opt for the Intermediate or Advanced level, where they can customize a more extensive set of variables.
“Setting up my own blockchain”
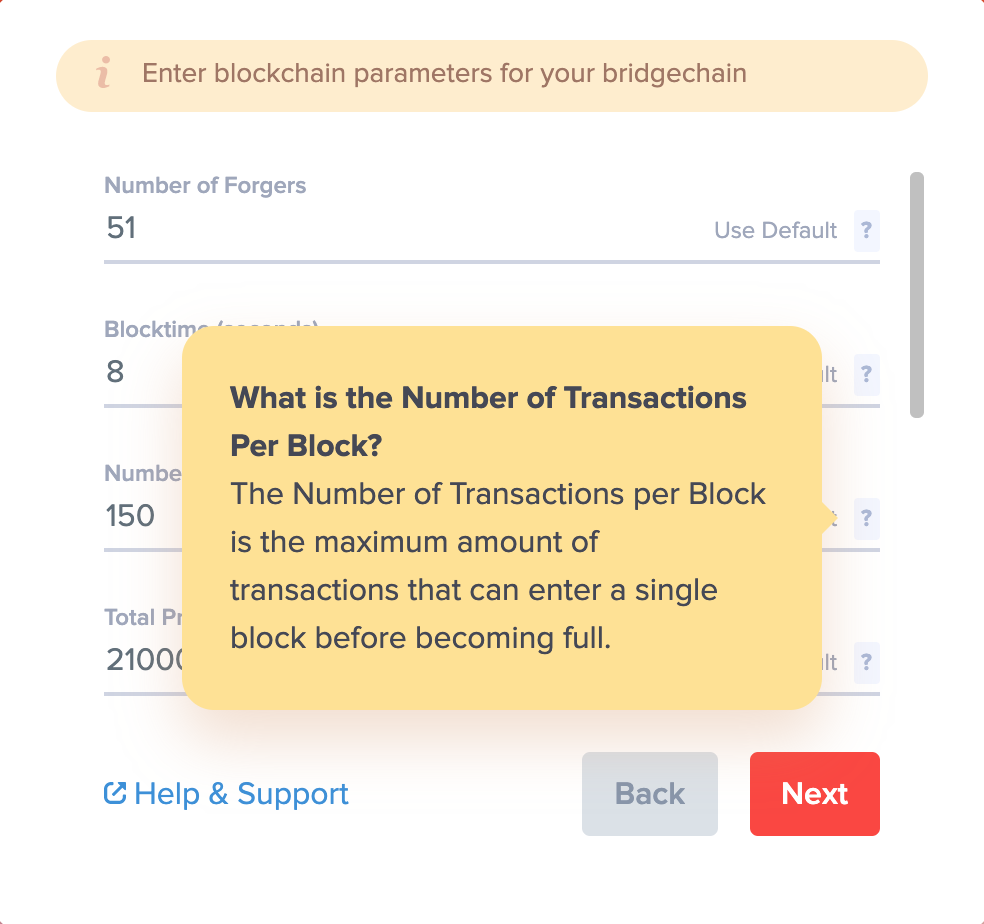


[ARK Deployer’s settings-screen before chain deployment (Advanced) – Source: https://deployer.ark.io/fees-static]
In the next step, users can make settings for their own chains.
The ARK Network uses the DPOS method for consensus algorithm, as do AERGO and EOS.
Therefore, there are “forgers”, a concept that is similar to BP(Block Producer) in the two blockchains.
In the ARK Deployer, users can customize variables such as forgers, blocktime, total issuance quantity, and fees according to their own needs.
Forgers generate blocks, and these blocks contain information about transactions that occurred during that time.
The information on such transactions can be viewed through Scan and Explorer, which are commonly called the explorers.
“How can the transactions be tracked?”

[AERGO Scan(left), ARK Explorer(right)]
-AERGO Scan: https://mainnet.aergoscan.io/
-ARK Explorer: https://explorer.ark.io/
Just as there is AERGO Scan in the AERGO Chain, there is ARK Explorer in the ARK Chain.
Users can view records of transactions that occurred in the chain and information about the blocks that are currently being generated.
Finally, the following is a summary of how to create bridgechain through the ARK Deployer.
– Source: https://deployer.ark.dev/
Step 1 Prepare: concepts and tasks to be addressed before creating a chain
1. Identifying the purpose
a) Users can select the level of customization(three levels available) according to which purpose the user wants to use the chain for, and each level offers a different set of customizable options
- Basic level: given the same settings as the ARK Public Network
- Intermediate level: allows customization of chain name, symbol, fee, token supply, and more
- Advanced level: allows customization of every specification(hosts, port numbers, Explorer customization, and more)
b) The wrong combination of parameters could decrease the chain’s stability and result in chain forking into oblivion (recommended specifications, public network)
- Number of Forgers: 51
- Block Time: 8 Seconds
- Number of Transactions per Block: 150
2. Network configuration
a) IP addresses of nodes(genesis node, peer nodes)
- Genesis node
- Peer nodes
b) Network profile
- Mainnet: the network that users run in productions, and which uses real transactions and coins of a public network (requires a minimum of 20 peer nodes)
- Devnet: the network used before being deployed on the Mainnet (requires a minimum of 5 peer nodes)
- Testnet: the network that users run locally, and which is used for testing purposes (no additional peer nodes required)
3. Server operation method
a) Explanation of server types and service providers, and exemplary cost estimations by different numbers of operational nodes
b) Server types and requirements
- VPS(Virtual Private Server)
- Dedicated Server
- Local Hardware
- Hardware requirements
| Type | Value |
| OS | Ubuntu
16.x/18.x |
| CPU | 2 Core |
| RAM | 8GB RAM |
| Storage | 20 + GB
SSD(HDD) |
4. Connecting to and preparing the server
a) Connecting to the server: guidelines to connecting to the server in different operating systems(such as by using PuTTy, ssh)
b) Preparing the server: creating a user and granting a new user sudo privileges
c) Preparing Github: creating and integrating Github Repo for the project
Step 2 Customize: customizing the chain
1. Selecting the customization level
– Users can choose between the Basic level, the Intermediate level, and the Advanced level
2. Naming the bridgechain
3. Configuring bridgechain parameters
4. Setting fees
– Static fees: setting the minimum and maximum value of fees (that are deemed reasonable)
– Dynamic fees: allows users to charge fees dynamically based on the transaction size (optional feature)
5. Configuring the server(host, database port, API port, and more)
6. Explorer
7. Additional options(Git, License)
8. Setting peers
– Mainnet: the minimum amount of peers required is 20
– Devnet: the minimum amount of peers required is 5
Step 3 Deploy: deploying the chain
1. Transferring the script
a) When customizing the chain is finished, an installation script is created. This is executed by the genesis node
b) During the genesis node generation process, the address and passphrases are displayed
- These are shown only once, and users must securely store these addresses and passphrases at their own responsibilities
2. Adding network peers
a) When the genesis node begins operating, users are advised to increase the network’s stability by adding peer nodes
- Testnet: no additional peers required
- Devnet: 5 additional peers
- Mainnet: 20 additional peers
3. Linking the wallet
a) Users can add the coins used in the bridgechain to ARK Desktop Wallet
4. Adding forgers
a) After the user creates a wallet and adds tokens, he can vote by clicking the “Delegates” tab (this incurs a fee because voting is executing a transaction)
5. Operating the chain
a) Users must destroy their genesis nodes, and make sure that nobody gets access to their genesis nodes
b) Security notice
- Users must elect for appropriate delegates to ensure that the network can be operated without the genesis node
- When the genesis node had collected rewards, users can burn or transfer that token
I hope this article has helped you to get a better idea of what BaaS and the ARK Deployer are.
Later, I will try to post an article about the ARK chain and also on how to configure a bridgechain step by step.