Blockchain technology began to emerge from a white paper published by Satoshi Nakamoto in 2008. Cryptocurrency is a representative example of using blockchain technology.
This article introduces another example of using the blockchain technology for our daily lives by making an online shop.
An online shop that utilizes the deterministic wallet
The book Mastering Bitcoin illustrates an example of making an online shop by utilizing a deterministic wallet. In the example, the administrator uses the blockchain address generated through a seed value as the unique blockchain address of the product. Then, the customer who wishes to purchase a product deposits the relevant amount to the blockchain address of that product.
Besides some minor differences, such a process is not very different from what happens in reality.
In the real world, an administrator registers products on the website and manages the inventories. In turn, a customer enters information such as the name, date of birth, phone number, and address to sign up as a member of the website. When a customer becomes a member of the website, he or she can purchase products and selects a payment method for the chosen product. Concerning the payment method, a customer can choose from real-time account transfer, no-book deposit, and credit card payment. Then, he or she makes payments using that method to the administrator.
Listed below are the differences between what happens now in reality and the world of blockchains.
First, the personal authentication
Second, finanical institutes
In the world we currently live in, there are multiples of different financial institutions. Each of them has a different set of financial services and business hours. Customers have to go through the registration process of the institution to utilize its services. Financial institutions are responsible for preventing third parties from making illicit use of their services and resolves this issue by mandating customers to undergo a personal authentication. The personal authentication can be done by utilizing various methods, including I-PIN, resident registration number, and personal mobile phones.
In contrast, the world of blockchains is comprised of decentralized nodes. Users generate addresses and corresponding private keys to use the relevant blockchain, and prove their identities by this process. In this world, complex processes that involve financial intermediaries to process payments or to forward the payment details to financial institutions do not exist. Instead, customers simply deposit a relevant amount to the blockchain address of the product. Then, all that needs to be done is to track the transaction that occurred with that blockchain address.
Now, I will build an online shop that utilizes the blockchain to examine how this is done. The process is largely divided into five parts: project setting, generating a blockchain address, using the generated address, organizing a frontend, and processing payment.
Project settings
Project settings will be done by using Gradle, a build system based on groovy. I will use a multi-project build to configure a root project and subprojects.
First, I create a new Gradle project in Eclipse.

Then, I write the settings.gradle file to define the root project and subprojects that I want to create.
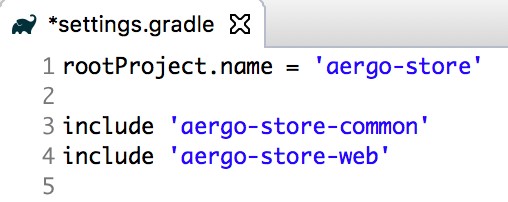
The next file I should write is build.gradle. After I finish this, I select the project and click the ‘Refresh Gradle project.’
|
1 2 3 4 5 6 7 8 9 10 11 12 13 14 15 16 17 18 19 20 21 22 23 24 25 26 27 28 29 30 31 32 33 34 35 36 37 38 39 40 41 42 43 44 45 46 47 48 49 50 51 52 53 54 55 56 57 58 59 60 61 62 63 64 65 66 67 68 69 70 71 72 73 74 75 76 77 78 79 80 81 82 83 84 85 86 87 88 89 90 91 92 93 94 95 |
group = 'io.blocko' ext { springBootVersion = '2.0.0.RELEASE' herajVersion = '1.1.0' } buildscript { repositories { maven { url "https://plugins.gradle.org/m2/" } google() mavenCentral() } dependencies { classpath "io.spring.gradle:dependency-management-plugin:1.0.8.RELEASE" } } allprojects { version '0.1-SNAPSHOT' } def javaProjects = [project('aergo-store-common'), project('aergo-store-web')] configure(javaProjects) { apply plugin: 'java' apply plugin: 'maven' apply plugin: 'idea' apply plugin: 'checkstyle' apply plugin: 'eclipse' sourceCompatibility = JavaVersion.VERSION_1_8 targetCompatibility = JavaVersion.VERSION_1_8 eclipseJdt.doLast( { ant.propertyfile(file: ".settings/org.eclipse.core.resources.prefs") { ant.entry(key: "eclipse.preferences.version", value: "1") ant.entry(key: "encoding/<project>", value: "utf8") } } ) idea { module { outputDir file('build/classes/java/main') testOutputDir file('build/classes/java/test') } } compileJava.options.encoding = 'UTF-8' compileTestJava.options.encoding = 'UTF-8' repositories { jcenter() mavenLocal() mavenCentral() } dependencies { compileOnly "org.projectlombok:lombok:1.18.8" testCompile "org.projectlombok:lombok:1.18.8" } checkstyle { project.ext.checkstyleVersion = '8.24' project.ext.sevntuChecksVersion = '1.26.0' ignoreFailures = true configFile = file("${rootProject.projectDir}/styles.xml") reportsDir = file("${buildDir}/checkstyle-reports") configurations { checkstyle } checkstyleMain { source = sourceSets.main.allSource reportsDir = checkstyle.reportsDir } dependencies{ assert project.hasProperty("checkstyleVersion") checkstyle "com.puppycrawl.tools:checkstyle:${checkstyleVersion}" checkstyle "com.github.sevntu-checkstyle:sevntu-checks:${sevntuChecksVersion}" } } task sourcesJar(type: Jar, dependsOn: classes) { classifier = 'sources' from sourceSets.main.allSource } jar { baseName = 'store' } } |
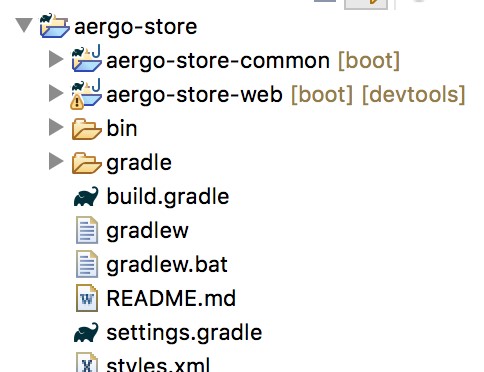
As shown below, the projects are defined according to the settings I created in the settings.gradle and build.gradle.
Having completed the project settings by using the multi-project build in Gradle, the next content will be about generating a blockchain address to be assigned to each product.
Generating a blockchain address
Most products can be identified by the name of that model. For instance, a product has various attributes, such as the product name, model number, and price. As shown in the example below, it is possible to use the model number as a primary key since it is unique and minimal. However, the product name ‘M-Logo Sweat’ cannot be used as a primary key since it is neither unique nor minimal.
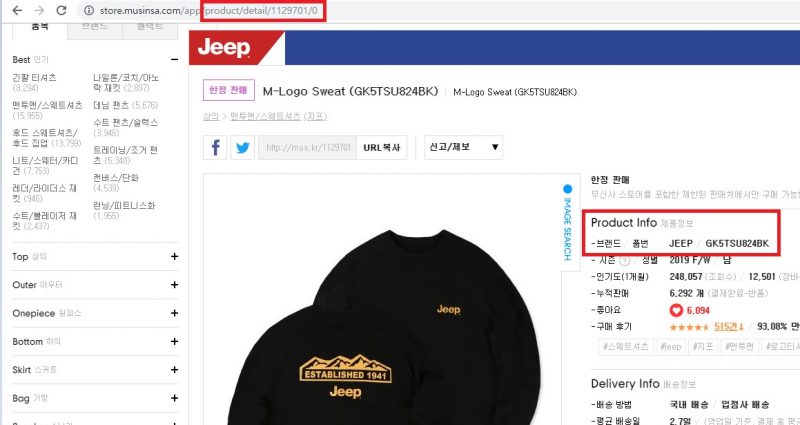
There are no consistent rules in determining a model number for a product, although some model names include product features such as the color or other specifications when needed. (related article: “How is a ‘model number’ determined for a product?”)
In the online shop that I am about to build now, a blockchain address generated by using Heraj (Java SDK for AERGO) will be used as the product identifier.
Blockchain addresses are generated by random numbers from 0 to 2256(=10⁷⁷). Such a scale is comparable to 10⁸⁰, which is the number of atoms in the visible universe. Thus, the same blockchain address can never be generated twice, which makes the blockchain address a viable option to be used as an identifier. Also, using a blockchain address as the product identifier enables customers to place an order through the address without having to make a membership account.
Currently, Heraj does not provide a function that generates address using deterministic wallets. So, to enable such a function, I need to build a new system. (on Heraj version 1.1.0). This can be resolved by using the DeterministicKey generation logic provided in the Bitcoin-core package.
|
1 2 3 4 5 |
final DeterministicSeed seed = new DeterministicSeed(mnemonicCode, null, passphrase, new Date().getTime()); final DeterministicKeyChain chain = DeterministicKeyChain.builder().seed(seed).build(); final List<ChildNumber> keyPath = HDUtils.parsePath("M/44H/60H/0H/0/0"); final DeterministicKey key = chain.getKeyByPath(keyPath, true); |
Then, I generate an AergoKey from DetermisticKey by using ECDSAKey provided in Heraj.

|
1 2 3 |
final BigInteger privatekey = key.getPrivKey(); final ECDSAKey ecdsaKey = new ECDSAKeyGenerator().create(privatekey); final AergoKey aergoKey = new AergoKey(ecdsaKey); |
Having completed generating the AergoKey, now I will demonstrate how I can use the AergoKey as a product identifier.
@PrePersist
Previously, I have generated the AergoKey by using the deterministic wallet. Now, I will set the AergoKey to be assigned as an identifier right before a product is saved in the DB.
In javax.persistence package, there is an annotation named @PrePersist. This is called right before the system calls the persist() method to manage the entity in the persistent context.
|
1 2 3 4 5 6 7 8 9 10 11 12 13 14 15 16 17 |
@MappedSuperclass @ToString(callSuper = true) public abstract class UuidEntity extends PersistableEntity implements Persistable<String> { @Id @Column(name = "UUID", updatable = false) @Getter @Setter protected String id; @PrePersist protected void prePersist() throws Exception { if (id == null) { id = childKey().getAddress().getValue(); } } ... |
The Product class that has inherited the UuidEntity class will now be assigned with a blockchain address as an identifier at the point where the product is fully registered in the DB.
|
1 2 3 4 5 6 7 8 9 10 11 12 13 |
@Entity @ToString(callSuper = true) @Table(name = "PRODUCTS") public class Product extends UuidEntity { @Getter @Setter protected String name; @Getter @Setter protected String color; ... |
Please refer to the link below for the entire source code.
https://github.com/id6827/aergo-store
The following content is about the frontend of the online shop.
Frontend
In this project, I will perform the implementation by using a traditional View Resolver, Thymeleaf. The first thing I need to do is to add thymeleaf-layout-dialect in build.grade, to be able to use Thymeleaf more efficiently.
|
1 2 3 4 5 6 7 8 9 |
dependencies { compile project(':aergo-store-common') compile "org.springframework.boot:spring-boot-starter-web:${springBootVersion}" compile "org.springframework.boot:spring-boot-starter-data-jpa:${springBootVersion}" compile "org.springframework.boot:spring-boot-starter-thymeleaf:${springBootVersion}" compile "nz.net.ultraq.thymeleaf:thymeleaf-layout-dialect:2.4.1" ... |
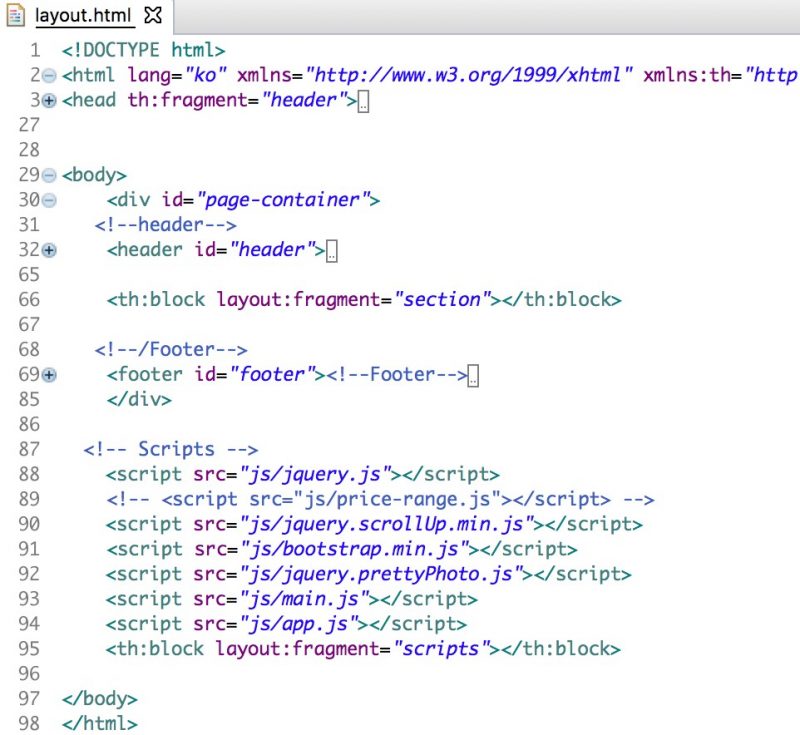
When I add the package, layout.html can be utilized as the base for all html.
This is how the directory looks like.
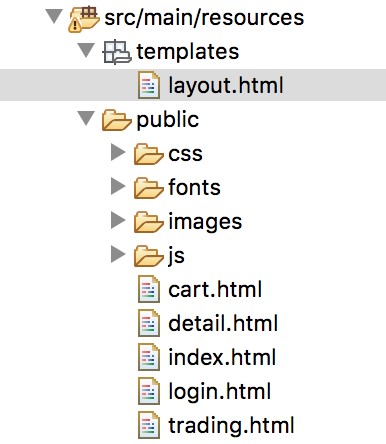
In the templates folder, I create layout.html to function as the base. In the public folder, I create the html file I will implement. Then, I set layout.html as the layout by using the layout:decorator tag and write any additional content in the fragment tag.
|
1 2 3 4 5 6 7 8 9 10 11 12 13 14 15 16 17 18 19 20 21 22 23 24 25 26 27 28 29 30 31 32 33 34 35 36 37 38 39 40 41 42 43 |
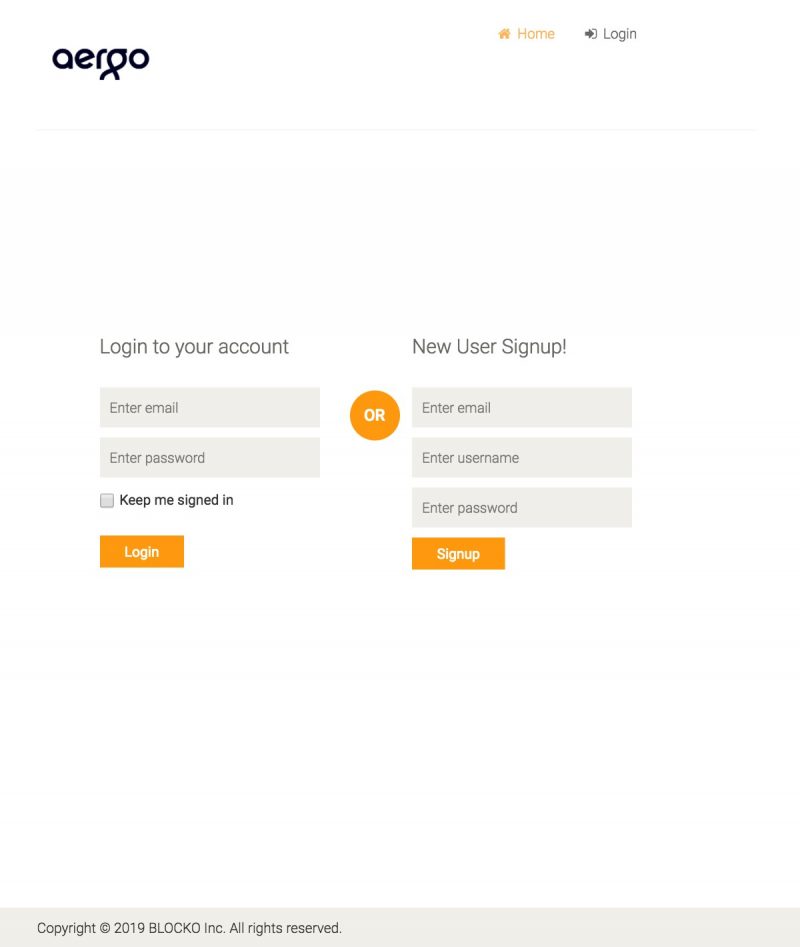
<!DOCTYPE html> <html lang="ko" xmlns="http://www.w3.org/1999/xhtml" xmlns:th="http://www.thymeleaf.org" xmlns:layout="http://www.ultraq.net.nz/thymeleaf/layout" layout:decorator="../templates/layout"> <th:block layout:fragment="head-title"> <title>Login | Aergo Store</title> </th:block> <th:block layout:fragment="section"> <section id="form"><!--form--> <div class="container"> <div class="row"> <div class="col-sm-4 col-sm-offset-1"> <div class="login-form"><!--login form--> <h2>Login to your account</h2> <form action="login" method="post"> <input type="email" name="email" placeholder="Enter email" /> <input type="password" name="password" placeholder="Enter password" /> <span> <input type="checkbox" class="checkbox"> Keep me signed in </span> <button type="submit" class="btn btn-default">Login</button> </form> </div><!--/login form--> </div> <div class="col-sm-1"> <h2 class="or">OR</h2> </div> <div class="col-sm-4"> <div class="signup-form"><!--sign up form--> <h2>New User Signup!</h2> <form action="/signup" method="post"> <input type="email" name="email" placeholder="Enter email" /> <input type="text" name="username" placeholder="Enter username" /> <input type="password" name="password" placeholder="Enter password" /> <button type="submit" class="btn btn-default">Signup</button> </form> </div><!--/sign up form--> </div> </div> </div> </section><!--/form--> </th:block> </html> |
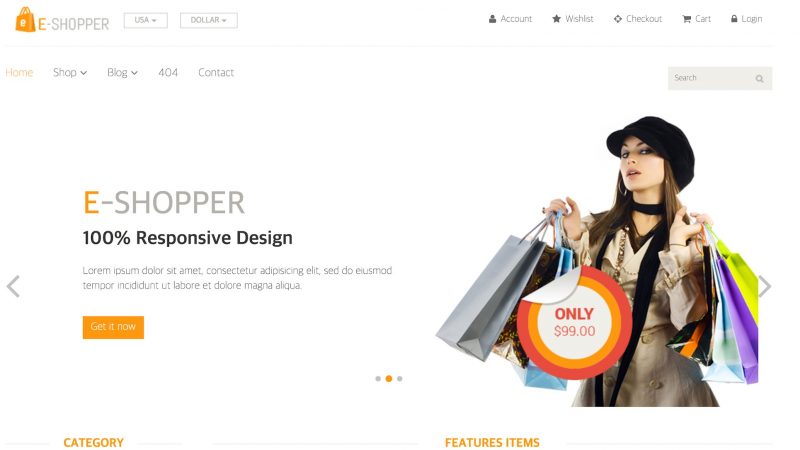
For a frontend template, one can use a self-developed template, a designer-developed template, or one that already exists. In making an MVP, the output must be produced quickly. Thus, I will perform this implementation by using a free template.
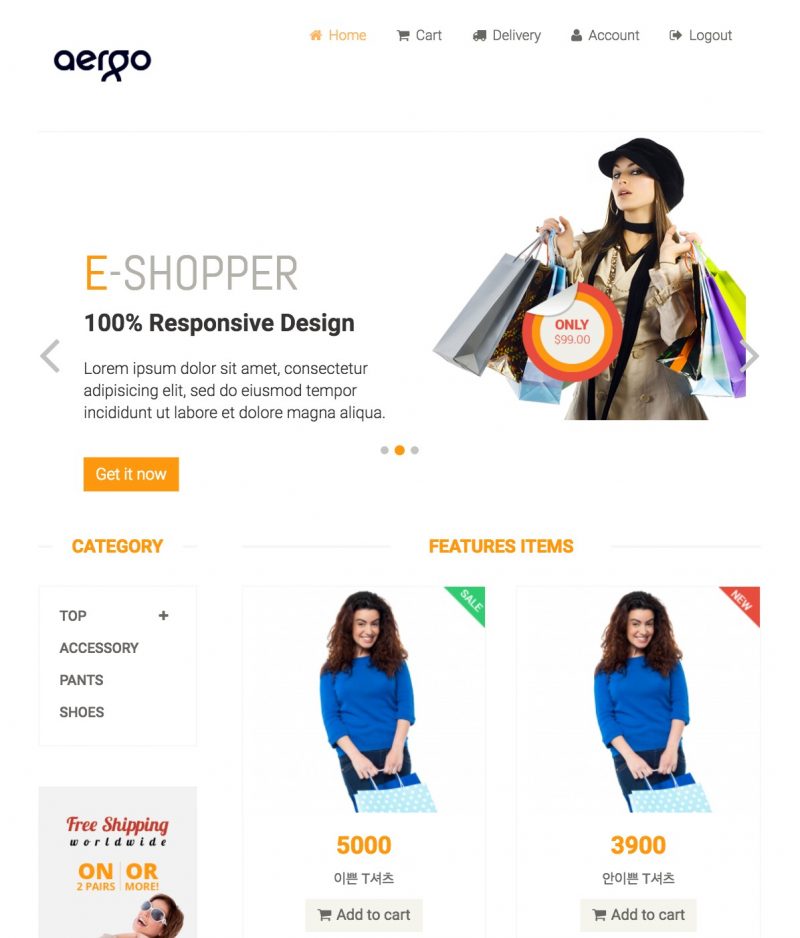
The template used in this implementation is a free template called eShopper. As shown below, the template includes basic features required in an online shop in detail.
I download the template and copy the file at the main/resources/public/ of the project.
Now I will demonstrate how to render the copied template file.
Server-side rendering
One can easily perform server-side rendering by utilizing SpringBoot and Thymleaf. Described below is how one can return the html file and object through the controller.
|
1 2 3 4 5 6 7 8 9 |
@GetMapping("index") public ModelAndView home() { final ModelAndView mav = new ModelAndView("index"); final Pageable pageable = PageRequest.of(0, 5); final List<Article> shirts = articleService.findByAll(pageable).getContent(); mav.addObject("articles", shirts); return mav; } |
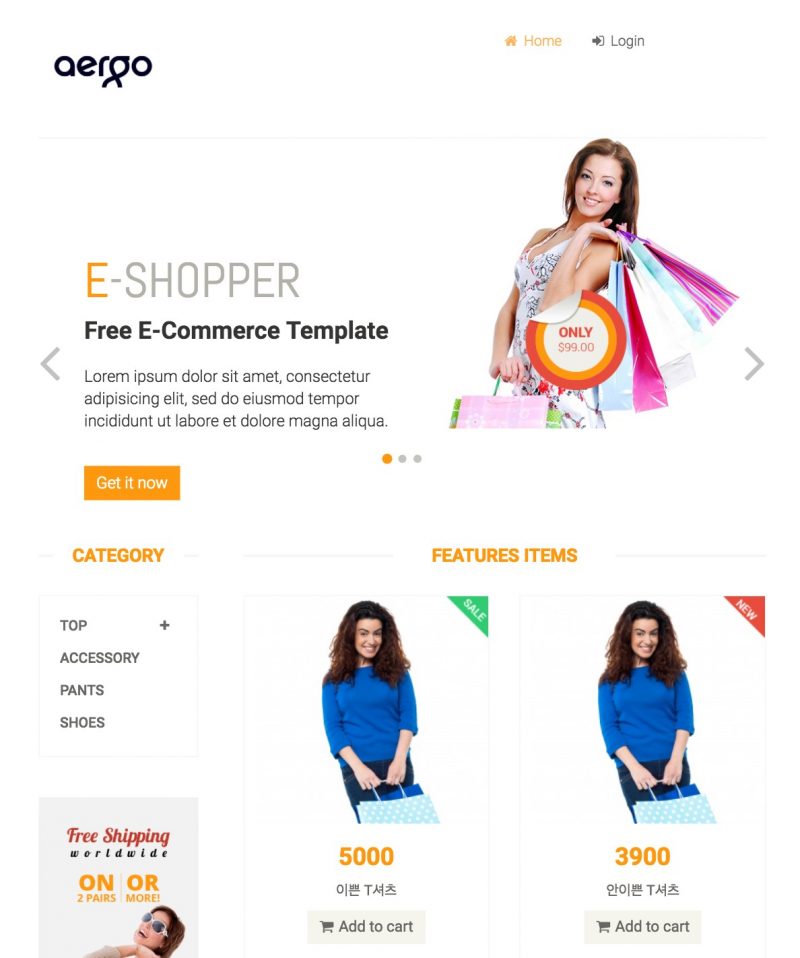
When there is a GET /index request, the server returns index.html and article object. This is how it looks like after rendering the returned result.
This is a login function after adding session processing functions.
|
1 2 3 4 5 6 |
@PostMapping("login") public ModelAndView login(final User user, HttpServletResponse response) throws Throwable { log.info("Login user : {}", user); return userService.login(user).map(u -> new ModelAndView("index", "user", u)) .orElse(new ModelAndView("index", "user", null)); } |
When a user successfully logs in, the website returns index.html and user information. Also, the user will be able to see the menu that had been hidden by th:if tag of Thymleaf.
|
1 2 3 4 5 6 7 8 |
<ul class="nav navbar-nav"> <li><a href="/" class="active"><i class="fa fa-home" aria-hidden="true"></i> Home</a></li> <li><a th:if="${user != null}" href="cart"><i class="fa fa-shopping-cart" aria-hidden="true"></i> Cart</a></li> <li><a th:if="${user != null}" href="/"><i class="fa fa-truck" aria-hidden="true"></i> Delivery</a></li> <li><a th:if="${user != null}" href="/"><i class="fa fa-user" aria-hidden="true"></i> Account</a></li> <li><a th:if="${user == null}" href="login"><i class="fa fa-sign-in" aria-hidden="true"></i> Login</a></li> <li><a th:if="${user != null}" href="logout"><i class="fa fa-sign-out" aria-hidden="true"></i> Logout</a></li> </ul> |
On this page, the user can add products in the cart by pressing the “Add to cart” button.
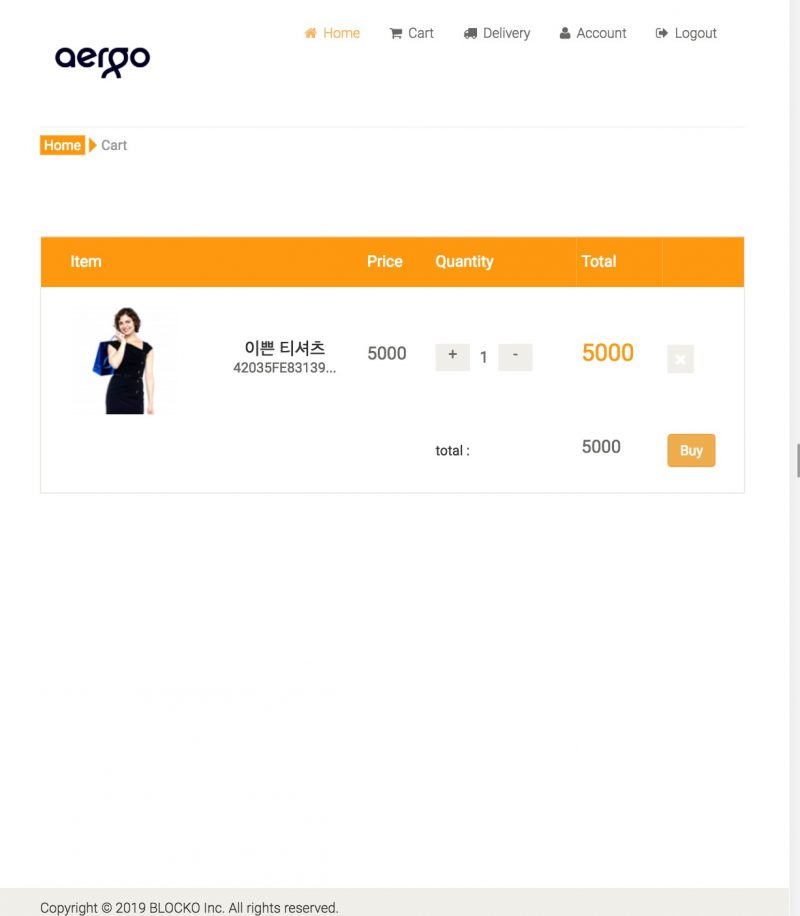
This page calls the REST API by using jQuery and Ajax to output the product. Then when the user clicks the Buy button, he or she is directed to the Trading page.
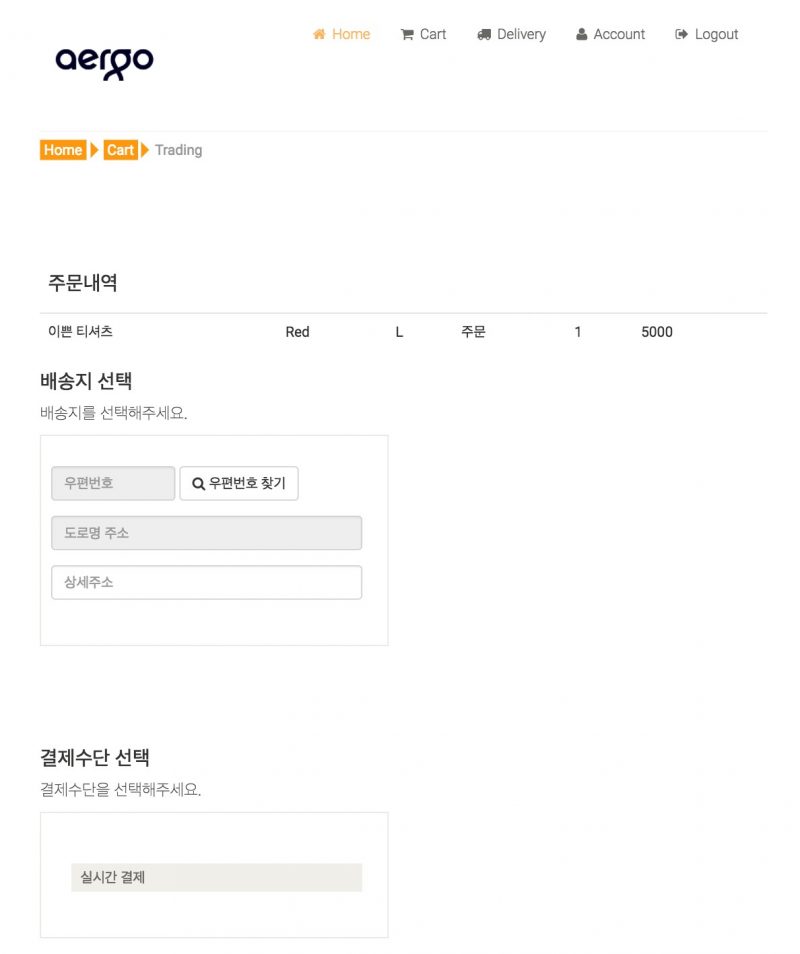
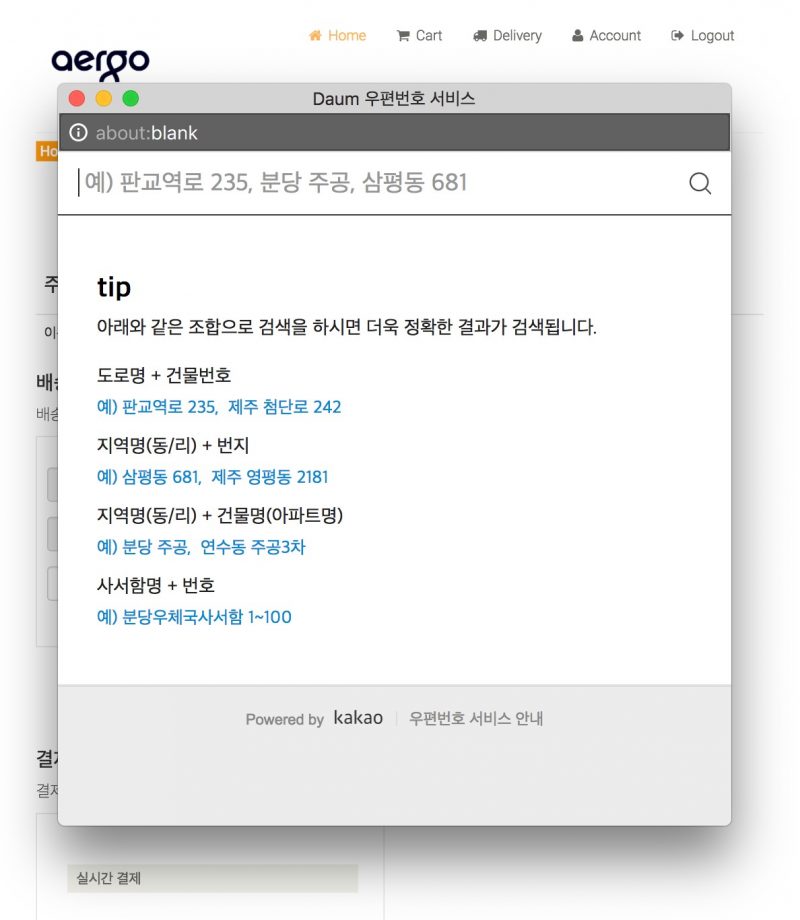
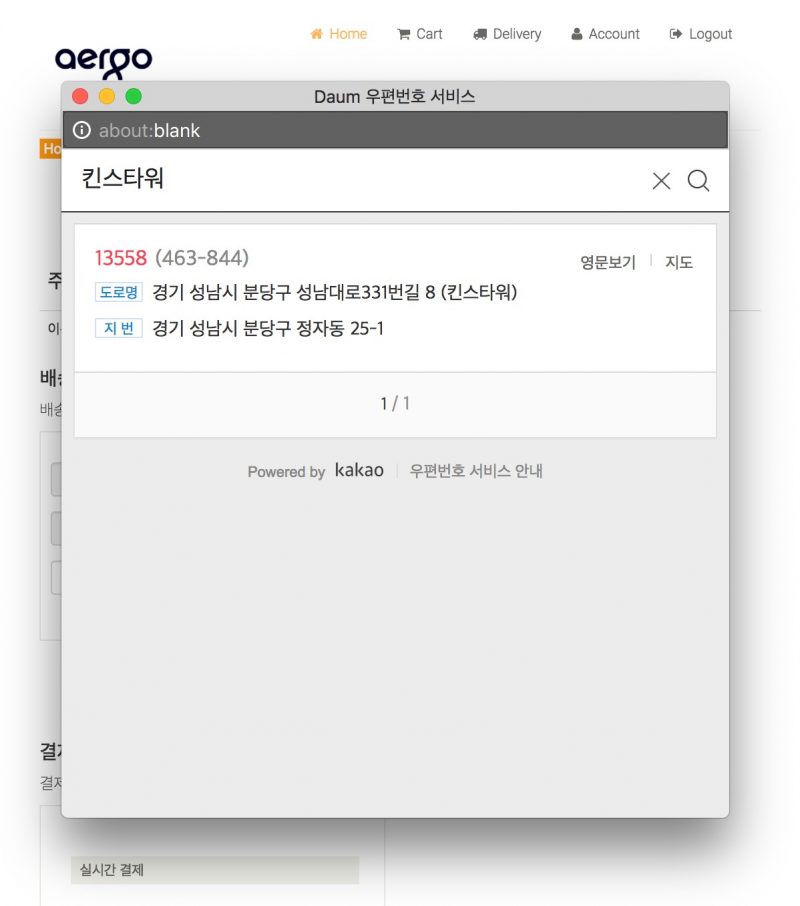
On the trading page, the user can check the order history. I have also included the postal code search function through API powered by Daum. When the user clicks the “Search postal code” button, a popup window, as shown below, appears.
When the user registers the address, he or she can select a payment method, and the payment is processed.
Payment
The payment system is yet to be implemented. In the future, the payment system will be developed, and it will be linked to the AERGO testnet. Then, the product payment will be processed by using the AERGO wallet.
Concerning the testnet, one can request for AERGO through this website: https://faucet.aergoscan.io/.
